
Installing a Door Yourself – Step-by-Step Guide
Do you want to install an interior door yourself? Good news: with a bit of manual skill and the right tools it is not impossible! In this article we guide you through the main steps of installing a door, so you can avoid the typical mistakes and get a result that looks professional.
1️⃣ Precise preparation: measuring the opening
The first step is measuring the door opening precisely. Use a tape measure and note down the following dimensions:
- Height – from the top edge of the floor to the bottom edge of the lintel, preferably measured in the middle
- Width – at the top, middle and bottom of the wall opening
- Depth – the thickness of the wall, measured at several points
Important! If the floor or wall covering is not finished yet, take it into account! For laminate flooring or parquet, leave a gap of about 3 mm.
2️⃣ Choosing the frame type
Based on the measurement, choose the appropriate door frame:
- Fixed frame – for standard wall thicknesses
- Adjustable frame – for non-standard or variable wall thicknesses
3️⃣ Determining the opening direction
The opening direction is a key question when choosing a door:
- Left-hand door: if, with the door closed, the hinges are on the left side
- Right-hand door: if the hinges are on the right side
Tip: it is ideal if the door opens towards the nearest corner of the room!
4️⃣ Assembling the door frame
Take out the parts and assemble them in a U shape:
- Use screws, glue or clips (depending on the frame type)
- Clean the frame after assembly
5️⃣ Setting the frame into the wall opening
Carefully place the frame into the door opening, using small wooden strips. The gap should be a maximum of 2 cm.
- Secure with wedges at the corners
- Use a spirit level: for vertical and horizontal adjustment
- Place further wedges near the hinges and the strike plate
Check symmetry at several points and correct as needed!
6️⃣ Bracing and trial fitting
Insert braces or door-frame supports at three points of the frame (top, middle, bottom). Then try the door leaf on: if it opens and closes smoothly, everything is fine!
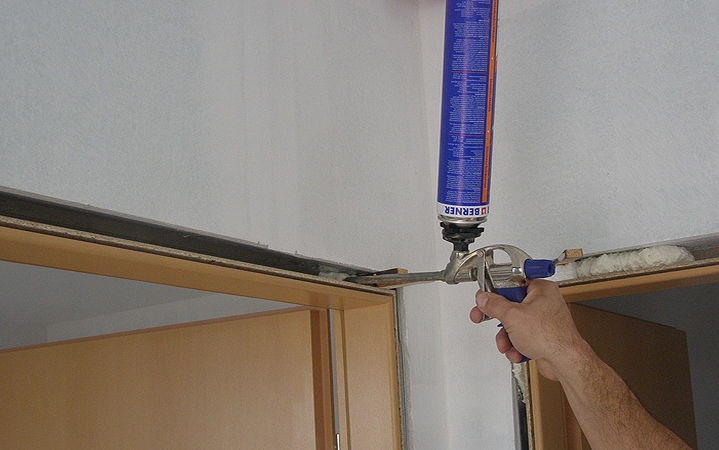
7️⃣ Foaming – fixing the frame with PU foam
- Spread sheeting on the floor
- Position the frame with assembly pads or wooden wedges
- Fill the gaps with PU foam – carefully, not too much!
When the foam has hardened:
- Remove the wedges
- Cut off the excess foam with a utility knife
- Seal the floor joints with silicone
8️⃣ Fitting trim boards, door leaf and handle
- Fit the trim boards (with wood glue if needed)
- Insert the door leaf
- Make the handle holes using a template – always drill from two sides!
- Fix the inserts, the rosette and finally the handle
Which tools will you need?
- Tape measure, spirit level
- Hammer, chisel
- Utility knife, prying tools
- Drill, drill bit
- PU foam and dispenser gun
- Wooden wedges, assembly pads, sheeting
One last good piece of advice...
Installing a door yourself is not impossible, but it requires great care and patience. A badly adjusted door can cause closing problems and heat and sound insulation issues over time.
If you are unsure, leave it to a professional!
More tips and help
If you would like to learn more about choosing a door, the opening direction or installation mistakes, read our related articles!
📞 We will help if you would rather leave it to us!
Get in touch or request a quote here: hello@windoza.hu